前端学习笔记
前端学习记录(1)
ts和js有什么区别
ts和js的主要区别如下:
- 类型系统 TypeScript是一个结构化的类型系统,JavaScript是一门无类型语言。这意味着在TypeScript中,变量、函数、对象等都有明确的类型定义,而在JavaScript中,变量可以随意赋值任何类型的值。 TypeScript的类型系统给JavaScript带来的好处是:
- 优秀的IDE支持(代码补全、接口提示等)
- 编译时的类型检查
- 减少不合理的代码
- 可选类型和严格null检查 TypeScript有可选类型,可以对可能为null的值进行类型定义。并且在严格的null检查模式下, eliminates抛出空指针异常。
- 接口 TypeScript支持接口,可以用来明确的强制一个合约。接口的好处是:
- 对对象的形状进行抽象
- 可以在编译时检查是否符合接口要求
- 枚举 TypeScript支持枚举,枚举可以使代码更清晰和简洁。
- 类 TypeScript作为一个面向对象的语言,支持类与继承。在TypeScript中,类有以下特点:
- 支持public, private和protected修饰符
- 支持抽象类
- 支持接口继承
- 编译器 TypeScript需要通过编译器编译成JavaScript后才可以运行,编译过程中会进行类型检查和语法检查。 总之,TypeScript在JavaScript的基础上,新增了可选的类型系统、接口、枚举、类等面向对象的语言特性,并通过强大的编译器,在静态检查的同时,生成干净的JavaScript代码。 两者的主要区别在于:
- 类型系统:TypeScript是结构化的类型系统,JavaScript是无类型
- 可选类型和空指针检查:TypeScript通过可选类型和严格的空指针检查提高代码稳定性
- 接口:TypeScript通过接口定义对象形状和编译时类型检查
- 枚举: TypeScript通过枚举使代码更简洁清晰
- 类:TypeScript支持类,继承等面向对象语言特征
- 编译器:TypeScript需要编译器编译为JavaScript后运行
在vue3+ts+antd设计一个表格的过程是什么
- 创建Table.vue组件,引入ant-design-vue的Table和其他组件:
<template>
  <a-table :columns="columns" :dataSource="dataSource" />
</template>

<script lang="ts">
import { defineComponent } from 'vue'
import { Table, Tag, Space } from 'ant-design-vue'

export default defineComponent({
  components: {
    ATable: Table,
    ATag: Tag,
    ASpace: Space
  },
  ...
})
</script>
- 定义表格的数据接口和类型:
interface TableData {
  id: number;
  name: string;
  age: number;
  address: string;
}

type TableRow = {
  key: number;
  name: string;
  age: number;
  address: string;
  actions: JSX.Element  // 操作列
}
- 定义表格列columns:
columns = [
  {
    title: 'Name',
    dataIndex: 'name'
  },
  {
    title: 'Age',
    dataIndex: 'age'
  },
  {
    title: 'Address',
    dataIndex: 'address'
  },
  {
    title: 'Actions',
    dataIndex: 'actions',
    width: 150,
    fixed: 'right'
  }
]
- 获取表格数据并设置给dataSource:
import axios from 'axios'

axios.get<TableData[]>('/table/list')
  .then(res => {
    this.dataSource = res.data.map(row => ({
      ...row,
      actions: (
        <Aspace>
          <ATag> Edit </ATag>
          <ATag> Delete </ATag>
        </Aspace>
      )
    }))
  })
- 发送新增/编辑请求并更新表格:
axios.post('/table/add', newRow)
  .then(res => {
    this.dataSource.push({
      ...res.data,
      actions: (...)
    })
  })

axios.put('/table/update', updatedRow)
  .then(res => {
    const rowIndex = this.dataSource.findIndex(row => row.id === res.data.id)
    this.dataSource[rowIndex] = {
      ...res.data,
      actions: (...)
    }
  })
- 发送删除请求并从表格删除相应行:
axios.delete(`/table/delete/${selectedRowKeys[0]}`)
  .then(res => {
    this.dataSource = this.dataSource.filter(row => row.id !== res.data.id)
  })
一个vue3+ts的页面结构是什么样的
- 入口文件main.ts:
import { createApp } from 'vue'
import App from './App.vue'

const app = createApp(App)
app.mount('#app')
- App.vue根组件:
<template>
  <div id="app">
    <router-view />
  </div>
</template>

<script lang="ts">
import { defineComponent } from 'vue'

export default defineComponent({
  name: 'App'
})
</script>
- routes/index.ts 路由定义文件:
import { createRouter, createWebHashHistory } from 'vue-router'
import Home from '../views/Home.vue'

const routes = [
  {
    path: '/',
    name: 'Home',
    component: Home
  }
]

const router = createRouter({
  history: createWebHashHistory(),
  routes
})

export default router
- views/Home.vue 视图组件:
<template>
  <div class="home">
    <h1>Home</h1>
  </div>
</template>

<script lang="ts">
import { defineComponent } from 'vue'

export default defineComponent({
  name: 'Home'
})
</script>
- shims-vue.d.ts 定义vue的类型声明:
declare module '*.vue' {
  import type { DefineComponent } from 'vue'
  const component: DefineComponent<{}, {}, any>
  export default component
}
- 其他.vue组件、接口定义、类型定义等。 以上就是vue3+ts项目的基本页面结构,主要包括:
- 入口文件main.ts
- App根组件
- 路由定义文件routes/index.ts
- 视图组件views/Home.vue
- shims-vue.d.ts的vue类型声明
- 其他vue组件、接口定义、类型定义等
ts和vue3有什么关系
ts和vue3有以下关系:
- vue3原生支持ts,可以直接在script标签上声明lang=“ts"即可使用ts语法。
<script lang="ts">
import { defineComponent } from 'vue'

export default defineComponent({
  // ...
})
</script>
- vue3提供了Composition API,其中许多API如defineComponent、ref、computed等的类型定义都在vue包中。
import { defineComponent, ref, computed } from 'vue'
- vue3的类型声明文件在@vue/runtime-dom和@vue/runtime-core中,需要额外安装:
npm install --save-dev @vue/runtime-dom
并在tsconfig.json中配置:
json
"types": [
  "@vue/runtime-dom",
  "@vue/runtime-core"
]
- 可以为props、emit定义类型,实现编译时的类型检查:
props: {
  msg: String
}

emits: {
  'update': (id: number) => boolean
}
可以与vuex、vue-router等库搭配使用,它们也提供了良好的类型支持。
可以定义组件的类型声明,用于template模板中:
import { defineComponent } from 'vue'

const Foo = defineComponent({
  // ...
})

export type FooInstance = InstanceType<typeof Foo>
然后在模板中使用FooInstance作为Foo组件的prop的类型:
<Foo :foo="bar" :baz="qux" />

<script>
import { FooInstance } from './Foo'

export default {
  props: {
    bar: {
      type: FooInstance    // 用Foo的类型声明作为类型
    }
  }
}
</script>
以上就是ts和vue3的主要关系,两者相得益彰,vue3提供了良好的ts支持,ts也增强了vue3的类型安全性和开发体验
typrscript学习:
Typescript官方仓库
https://github.com/microsoft/TypeScript/
ts官网: https://www.typescriptlang.org/
ts文档: https://www.typescriptlang.org/docs/
其他推荐学习网址: https://www.tslang.cn/ https://www.runoob.com/typescript/ts-tutorial.html
云原生学习记录(1)
今天来分享云原生模块的相关知识,主要就目前广泛使用的容器运行引擎docker和容器编排平台k8s。
docker基础操作
详细的基础操作之前有写过,这里就分享下简要的用来复习。再推荐下docker的学习网站,因为人家做的更专业值得我们学习。
常用命令:
- 镜像管理
- docker images:列出本地镜像
- docker search:搜索镜像
- docker pull:拉取镜像
- docker rmi:删除镜像
- 容器管理
- docker ps:列出运行中的容器
- docker ps -a:列出所有容器
- docker run:运行容器
- docker start/stop/restart:启动/停止/重启容器
- docker rm:删除容器
- docker kill:强制停止容器
- docker inspect:查看容器详细信息
- docker logs:查看容器日志
- docker attach/exec:进入运行中的容器
- docker cp:从容器中拷贝文件/目录到本地
- 容器rootfs命令 容器的rootfs目录存放在/var/lib/docker/overlay2下(storage driver为overlay2时),常用命令有:
- ls /var/lib/docker/overlay2:查看所有容器 layers
- cd /var/lib/docker/overlay2/容器ID:进入容器层
- ls:查看容器内文件结构
- cat文件:查看容器内文件内容 这些命令在调试容器的时候会很有帮助。
- 网络管理
- docker network ls:列出网络
- docker network inspect:查看网络详细信息
- docker network create:创建网络
- docker network connect/disconnect:连接/断开容器和网络
- docker network rm:删除无用网络
- 存储管理
- docker volume ls:列出数据卷
- docker volume inspect:查看数据卷详细信息
- docker volume create:创建数据卷
- docker volume rm:删除数据卷
- Dockerfile管理
- docker build:从Dockerfile构建镜像
- docker history:查看镜像构建历史
- docker tag:为镜像打标签
- 其他命令
- docker info:查看Docker系统信息
- docker version:查看Docker版本
- docker stats:查看容器资源使用统计信息
- docker system df:查看Docker磁盘使用情况
- docker system prune:清理无用数据
- etc.
- 官方文档
这个没的说,不管使用什么产品,官方肯定是最准确最及时的
- play with docker
强烈推荐!真的很好用,有免费时长让你练习,练习基础命令够够的了。
官网地址:
https://labs.play-with-docker.com/
- docker入门到实践 可以说是相当详细了,从什么是docker,为什么用docker以及安装使用,基本面面俱到了。
https://docker-practice.github.io/zh-cn/
这里其他也有很好的学习资源就不一一推荐了,掌握基础命令并实践,学会docker真的很轻松。
再分享一些关于docker的小技巧:
- 查看Docker系统信息 使用docker info可以查看Docker系统的详细信息,包括:
- 存储驱动(Storage Driver)
- 镜像数(Images)
- 容器数(Containers)
- 运行容器数(Running Containers)
- 主机OS(Operating System)
- 内核版本(Kernel Version) 命令: docker info
查看Docker磁盘使用情况 Docker的磁盘使用情况,包括镜像、容器和数据卷所占用的空间。 命令: docker system df
查看Docker内存和CPU使用
Docker Desktop和Docker Engine都提供了查看内存和CPU使用的功能。 在Docker Desktop的Preferences中开启“Advanced”选项,就可以看到内存和CPU的使用监控。
在Docker Engine上,可以安装dockmon来查看内存和CPU metrics: bash docker run -d –name dockmon –restart=always -v /var/run/docker.sock:/var/run/docker.sock ukhomeofficedigital/dockmon:v0.7.1
然后访问http://localhost:8080 就可以查看Docker主机的metrics。
查看Docker日志 Docker的日志存放在/var/lib/docker/containers下的json文件中,可以通过docker logs命令查看container的日志。 也可以开启json-file或syslog日志驱动,并指定日志文件位置。Docker会将容器的日志输出到该文件中,方便查看。
监控Docker资源 可以使用第三方监控工具来监控Docker的各项资源使用情况和性能指标,如:
- Cadvisor:监控CPU、内存、文件系统和网络资源
- Prometheus:时序数据库,可以收集cadvisor等exporter的数据并存储
- Grafana:将Prometheus数据进行可视化,方便查看各metrics
- Node Exporter:采集Docker host metrics
镜像以及容器备份恢复
docker save docker save可以将镜像另存为归档文件,例如: docker save -o ubuntu.tar ubuntu 这会将ubuntu镜像导出为ubuntu.tar文件。
docker load docker load可以将归档文件(通常是.tar格式)载入到本地镜像仓库,例如:
docker load -i ubuntu.tar 这会将ubuntu.tar文件加载为本地镜像,名称同原镜像(ubuntu)。
- docker export docker export可以将容器中运行的应用导出为归档文件,例如:
docker export -o nginx.tar nginx-container
这会将nginx-container容器导出为nginx.tar文件。
- docker import docker import可以将归档文件导入为镜像,例如:
docker import nginx.tar nginx-image 这会将nginx.tar文件导入为nginx-image镜像。
- docker commit docker commit可以将容器状态保存为镜像,例如:
docker commit nginx-container nginx-image
这会将nginx-container容器的状态提交为nginx-image镜像。
通过以上几个命令,可以实现Docker镜像与容器的备份、迁移与恢复:
- docker save/load:实现镜像的导出/导入,用于镜像备份与迁移
- docker export/import:实现容器应用的导出/导入,用于容器备份与迁移
- docker commit:可以保存容器状态为镜像,实现容器备份
掌握了以上这些,基础使用就没问题了。
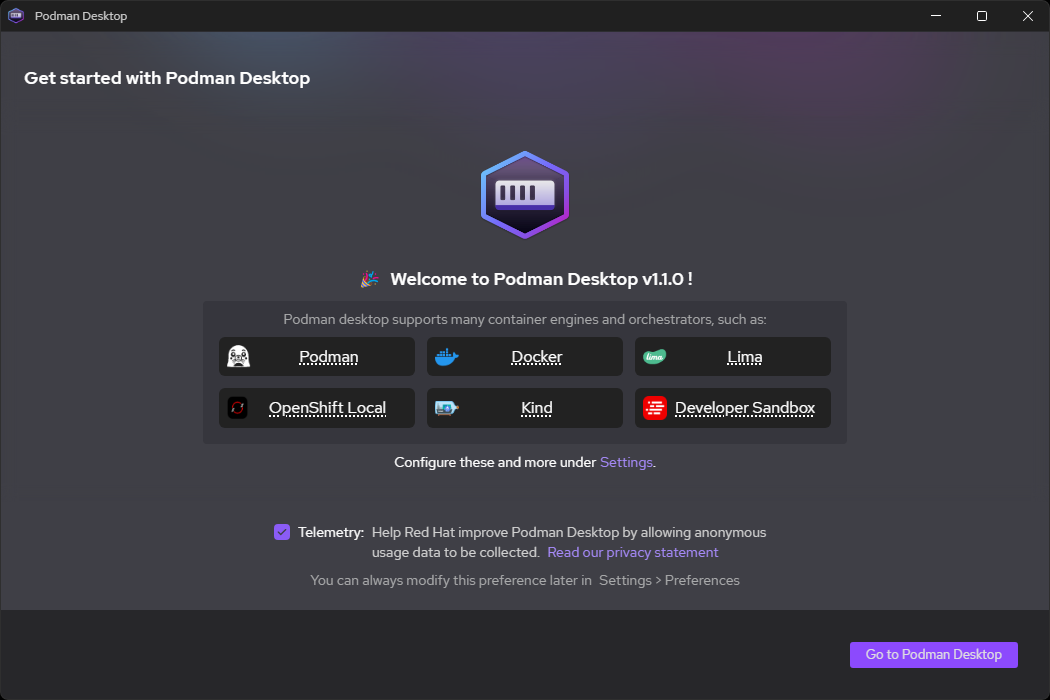
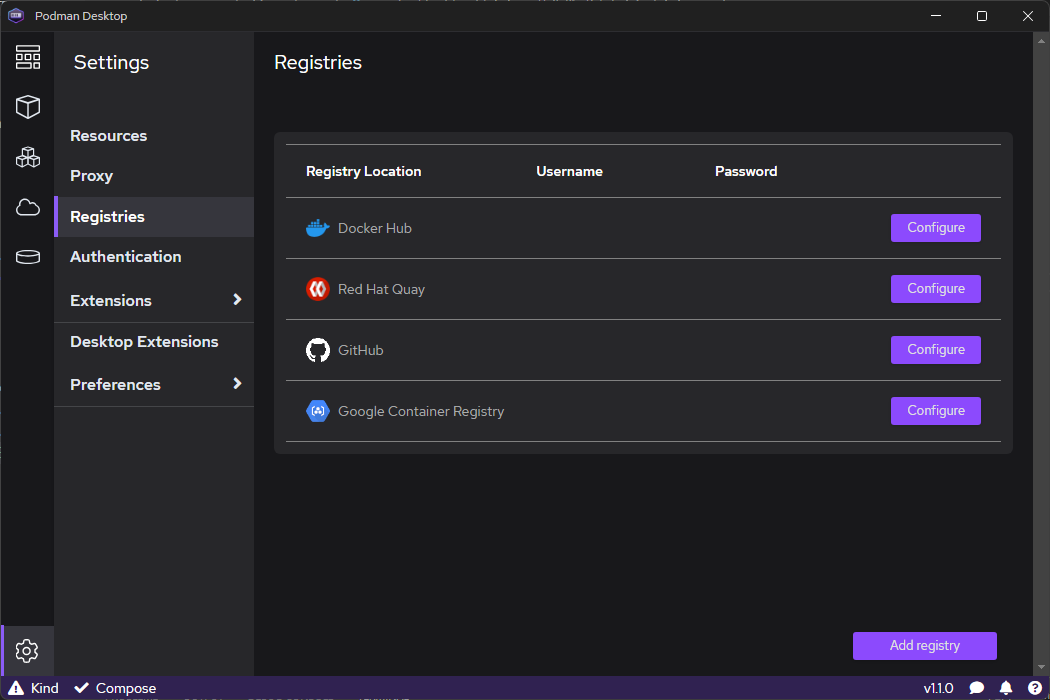
podman
最近podman还是比较火,我看官网,最近桌面版本1.1.0发布了,我这就安装使用了下,详细的使用情况后面分享,就先介绍下大致情况。
更新说明: https://podman-desktop.io/blog/podman-desktop-release-1.1
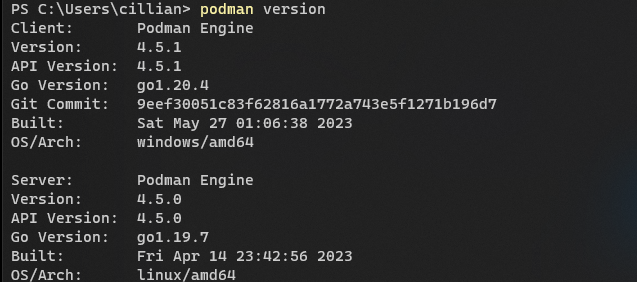
podman是一款容器引擎,与Docker类似,可以在Linux系统上运行OCI兼容的容器。
Podman与Docker的主要区别是:
- Podman不需要守护进程(daemon),Docker需要启动Docker daemon后才能使用。
- Podman的容器默认使用rootless模式运行,不需要root权限。Docker的容器默认需要root权限。
- Podman使用Libpod作为其容器引擎,而Docker使用自己的引擎。
- Podman可以兼容Docker CLI命令,方便Docker用户迁移。但也有自己的podman命令。
Podman的优点主要是:
- 无需守护进程,更轻量级
- rootless模式,安全性更高
- 兼容Docker,降低用户迁移成本
兼容性: 支持平台: Linux、macOS、Windows
兼容 Docker API、Lima、Kind、Openshift Local、Podman Machine
安装方式: https://podman-desktop.io/downloads